Download
A couple of days ago I posted about the fact that I'm occupied with writing a DIY howto guide for a multi-touch display in Dutch. I decided not to finish the Dutch version. At this point I'm translating what I already wrote down in Dutch to English and I will continue to write the howto guide in...

Interview Last week I was interviewed by an editor from England for a newsletter called 'LEDs in lighting and display news' published by Pira International (www.intertechpira.com). I told him some about the project and I redirected him to David Wallin and to Dr. Johannes Hirche (project supervisor...

Some time ago I wrote about how to change the lens from this Philips SPC900NC webcam to let it collaborate with the DIY FTIR multi-touch project. I dissambled the entire webcam back then, which seems to be unnecessary. You can easily rotate the round grey thing (with all the small lines carved in...

I'm currently occupied with writing a detailed DIY FTIR multi-touch display howto guide in Dutch, which will be available for download as soon as I finished it (within 3 weeks).
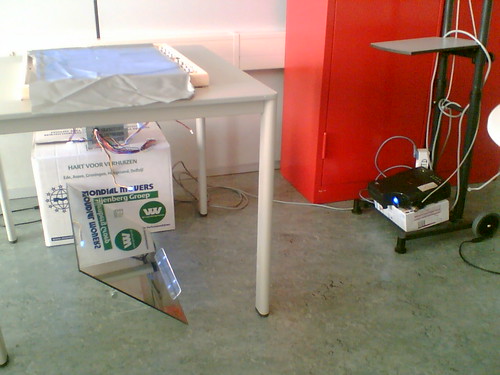
Last thursday I went to school along with the display to entirely setup and test the multitouch system with my 3 projectmates Riekus van Montfort, Jurriaan Mous and Martin Kuipers.
After being busy for quite a while to get in shape with Actionscript 3 to collaborate with this multitouch project, I was able to work on the screen again.
For those people, that are being to lazy to visit my Flickr and view my photo's over there.Here are a couple of pictures taken with my old Sweex webcam in infrared modus.
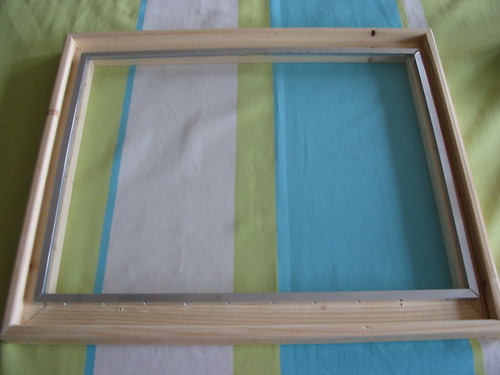
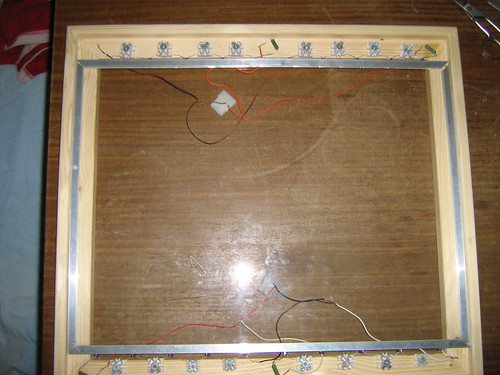
My wooden frame has arrived. My uncle makes wooden frames for paintings and since they only cost 5 euro I asked him if he could make one for me. The acrylic/aluminum part leans on the wooden frame on the left and the right side and a little bit on the top and the bottom as well. Notice I have space...
For those of you interested, there's a Flickr and Youtube group around our Multi-touch Open Source community.