
 Download
Lynn Marentette, M.A., Sp.A.
K-12 Technology Specialist at NUITEQ®
I’m happy to introduce the first in a series of regular posts about Snowflake MultiTeach® and how it can be used to support teaching and learning in classrooms that are moving forward with multi-touch, multi-user collaborative educational technologies. This first post is designed for the MultiTeach® newbie. Future posts will include topics suggested by teachers as they gain experience with Snowflake MultiTeach® software.
You have (or are getting) a new multi-touch, multi-user display. Now what?
Over the past year, many school districts are replacing their projector-based interactive whiteboard systems with high definition multi-touch, multi-user displays. Benefits include a display surface that doesn’t require turning down the classroom lights, collaborative software that allows two or more students to interact with educational content, and a long-term cost savings through the elimination of the cost of replacing expensive projector bulbs.
Teachers are amazed at all of the features the newest displays have to offer, especially the software that supports pair and group interaction, something that was difficult to support with single-touch displays. Some schools have opted to purchase portable displays that transform with a touch of a finger into a multi-touch table. This is great for classrooms that focus on project based learning and other forms of collaborative group work.
So where to start?
Although the new displays come with educational software and web-based resources and tutorials, teachers who are early adopters of multi-touch, multi-user technologies are educational pioneers. Super tech-savvy teachers will have no problem diving right in, or diving right in after watching the video tutorials and playing with the various apps and lessons that ship with Snowflake MultiTeach® and lessons downloaded from the MultiTeach® Lessons Community.
For many teachers, a gradual approach works best:
For the first few weeks, continue is to use your display as before, as it will have no trouble functioning as a single-touch IWB when you access your favorite educational websites and subscriptions. Review your lesson plans and think about ways you might integrate a few multi-touch lessons into your instructional day. Take your time to look over the NUITEQ® wiki and watch the video tutorials. Bookmark the links for future reference. Spend some time exploring the educator resources on the MultiTeach® Pinterest site.
Since you are likely not to be alone as a MultiTeach® newbie, the support of your peers during the transition period is important. Work out a plan with your colleagues to help make an effective transition. Teachers who meet regularly to plan instructional units might want to tackle this together.
This is true for learning how to use Snowflake MultiTeach®, especially the Lessons App, which opens so many creative possibilities. The instructional videos are short, which you can find here, so watching them along with your colleagues is recommended.
Below are a few ideas for starters:
If you have a stationary vertical display, you can use existing Snowflake MultiTeach® apps and existing lessons to introduce an instructional unit or new concepts. The software was designed for two or more children to use, so think about calling up two students to the display to interact with the lesson’s content. You can also have students take turns in pairs or small groups to explore content in lessons as they interact with the display.
You can use the Spinner Lesson App to enter essential questions for group discussion starters.
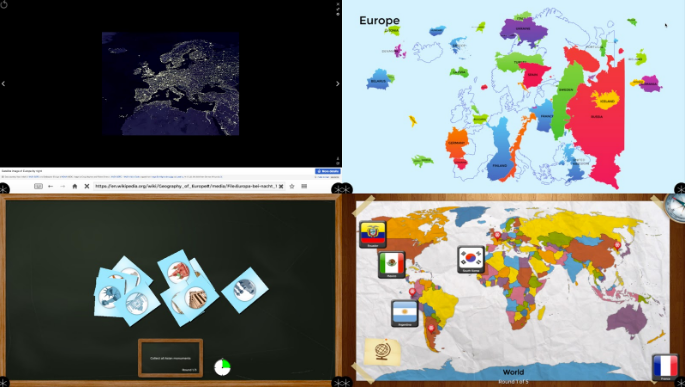
After you have tried out a few lessons with your students, think about ways you can present concepts using the Zones feature. For example, the following is a screenshot of several lessons about that can be used within a broader instructional unit about animals and their habitats:

Here are more examples of combining related MultiTeach® apps and Lesson Apps using the Zones feature:
Elementary Math

Sea Turtles

Human Body Systems

Middle School/High School English

Marine Biology

Career Awareness

Preschool Concepts

All of the above examples are good for introducing and reviewing concepts, and work best when presented within a broader instructional unit.
So you have a multi-touch display that converts into a table?
Although the above examples show how Snowflake MultiTeach® apps work on a vertical display, they all can be used with groups of students on tabletop displays in Zones by changing the orientation using the icon in the corner menu:

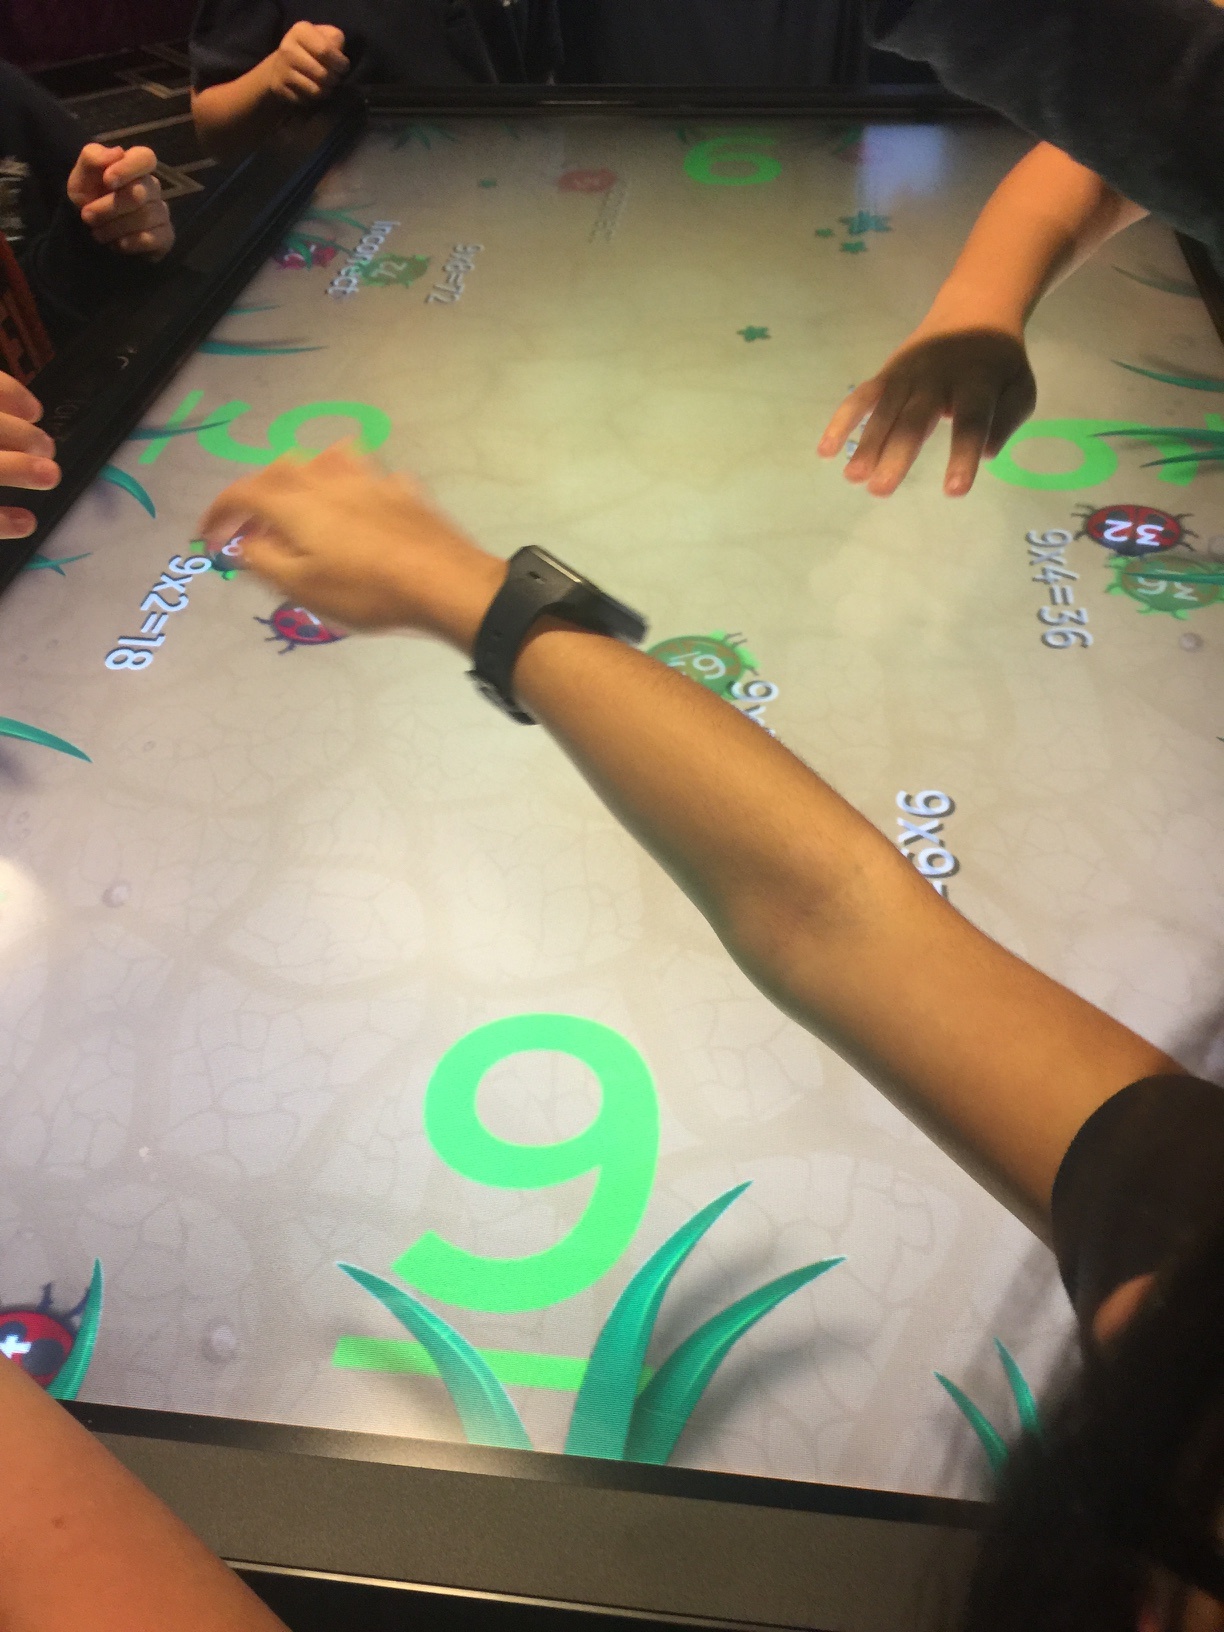
Below are some examples of single-app use, suitable for a group of students on a multi-touch table:
Math Bugs


Drop

Einstein

Newbie Tips:
- You can easily make a copy of a lesson on your hard drive, import the copy, customize it by adding audio, switch out photos, or entering text. Many of the lesson app types can be easily transformed to other types, preserving your content.
- Create a file for digital content that you’d like to use in the lessons you plan to make in the future. Organize your content in a meaningful way. For example, by subject matter and/or content type. Here you can keep your favorite videos, PowerPoint presentations, instructional PDFs, audio, and photos. All of this content can be incorporated into future MultiTeach® learning experiences. Be sure to create a folder for student-generated content!
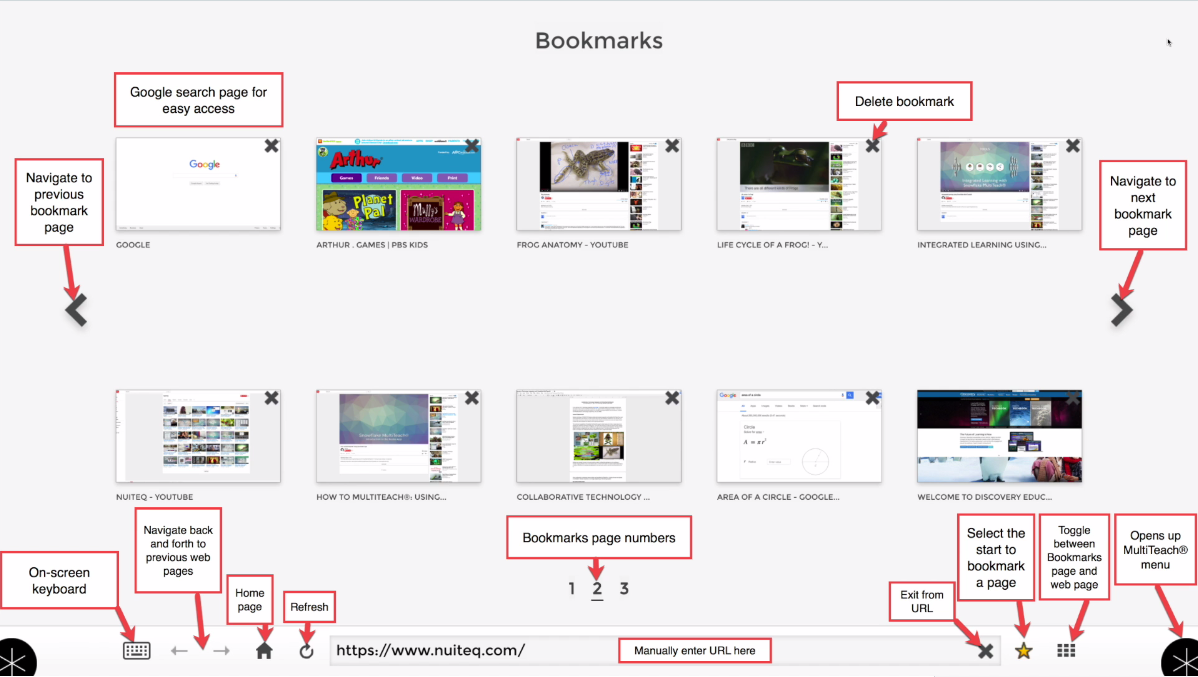
- Bookmark resources that will help you along the way- the NUITEQ® website for tutorials, the MultiTeach® Lessons Community, the MultiTeach® Pinterest site, and links to your school’s web-based subscription resources.
- Work with your colleagues to learn how to create lessons for use in your school, test them out, and then upload the best to the MultiTeach® Lessons Community.

Sign up for our news letter to stay up to date on new similar blog posts.

Follow MultiTeach® on Twitter and Facebook for updates, news, and tips!
Looking forward:
Adopting new educational technologies takes time and a lot of thoughtful reflection. Because multi-touch, multi-user technology new to the classroom, you are a pioneer. You are learning along with your peers – and your students. As an early adopter, other teachers will learn from your experience. Feel free to share your successes, and ways you’ve overcome challenges!
For those interested in advanced topics related to interactive educational technology, follow my personal blog, Interactive Multimedia Technology. Future blog post topics include an update about Universal Design for Learning, Richard Meyer’s research about multimedia learning, and an updated review of scholarly research about collaborative interactive displays and surfaces in education.


